


How to Master the AIMO Stencil Printer: Your Complete Guide
Are you still spending hours manually creating tattoo stencils? This time-consuming process limits your studio’s client capacity, eating into your profits. AIMO Stencil Printer – a tattoo artist’s ultimate time-saver – solves this perfectly by printing complex, large-scale designs in just 3 seconds with surgical precision.
Whether you’re a studio professional or home enthusiast, this guide unlocks:
- 3-second stencil printing (even for intricate designs)
- Seamless oversized tattoo transfers through sectional printing
- Proven maintenance techniques to keep your printer running flawlessly

Procedure
Step 1: Downloading the App
For Mobile: Search for the “ePrinter” app on App Store® or Google Play for download and installation.
For Desktop: Download from [AIMO TATTOO Drive] (Windows/Mac compatible)
Step 2: Prepare Your Design
Create your tattoo design on mobile or desktop. Download ready-made patterns from the website, or edit your own using the ePrinter app.
Step 3: Load the Transfer Paper
Preparation Before Use
- Take out a piece of tattoo transfer paper, and remove its Protective Sheet.
- Trim the Yellow Backing Sheet along the top adhesive seam with a ruler or scissors.
Paper Installation Guide
- Long-press the Power Button for 3 seconds until the Indicator Light is green to power up the printer.
- Simultaneously press the Cover Open Buttons with both hands.
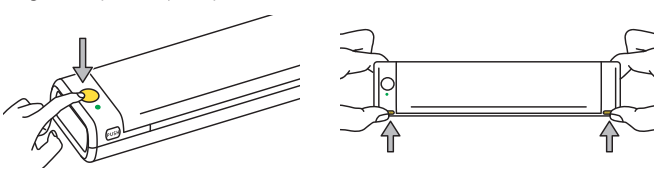
- Open the Top Cover.
- Remove the protective paper.
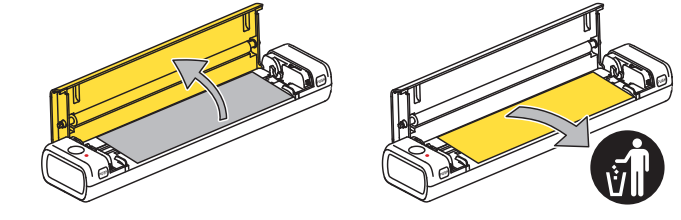
- Place the white tracing paper face up and flat into the printer in the direction of the paper outlet. Make sure the tattoo paper covers the sensor.

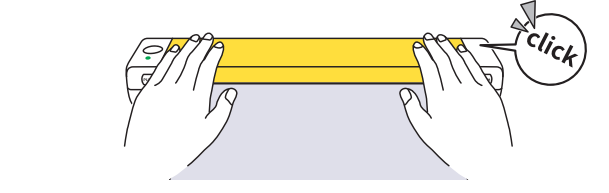
- Put the Top Cover back down and press down on both of its ends at the same time until you hear a click, indicating the cover is securely closed.
Step 4: Printing via Mobile App
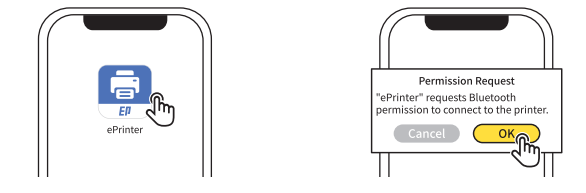
- Open the “ePrinter” app.
- Grant permissions.
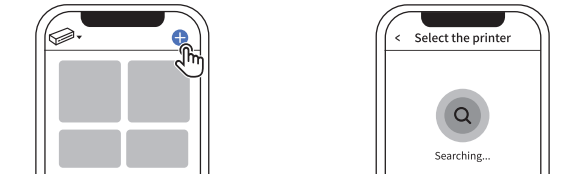
- Tap [ + ] at the top right corner.
- Wait for the printer to be searched.
- Tap [Connecting].
- The printer has been connected.
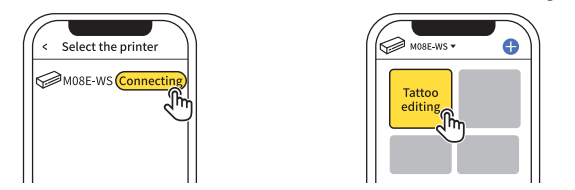
- Edit your first image, and tap [打印机标志] after you finish editing.
- Confirm the preview of the image, and tap [Print].
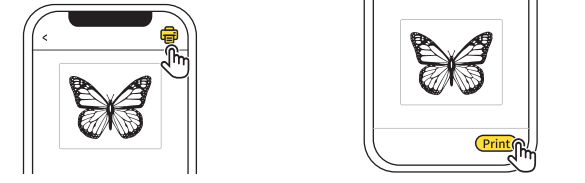
- Printing is completed.
- Retrieve the printout.
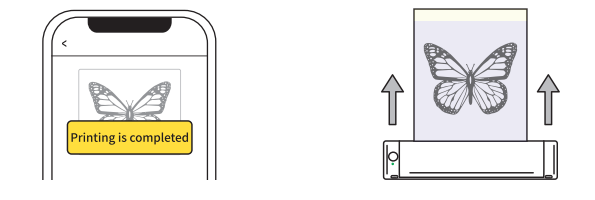
- Tear off the White Tracing Sheet for use.
Power Up Your Printing: Key Features of the AIMO M08E-WS
1. Color to line Drawing
Use the transfer line filter in the app, turn your favorite pattern into a tattoo line drawing in one click!
2. Image Cutting
Adds image cutting function for large tattoo stencils, can print and copy your large tattoo designs to skin perfectly without error.
3. Tattoo Preview
Over 68% of tattoo clients hesitate because they can’t visualize designs on their bodies pre-commitment (Ink Journal 2024). This uncertainty leads to consultations, wasted studio time, and lost bookings.
AIMO printers deliver the definitive solution: Activate Virtual Preview in our APP, select the target body area, upload your design, then resize and reposition it to instantly display the finalized result for client approval.
Cleaning and Maintenance
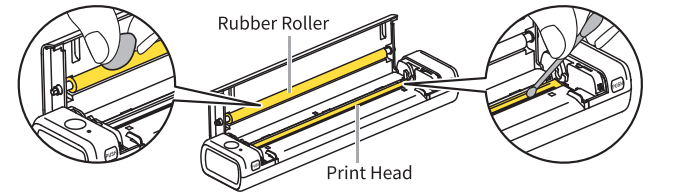
If you encounter issues such as blank lines, blurry print, or missing words, it may be caused by dirt on the Print Head. Please follow these steps:
1. If you have just finished printing, wait for at least 30 minutes for the Print Head to cool down completely.
2. Use a cotton swab dipped in alcohol or a dry alcohol-soaked cotton ball to gently wipe the Rubber Roller and the Print Head left and right 5 times each, removing dust and stains from the surfaces.
3. Wait 5-10 minutes for the alcohol to evaporate completely before closing the Top Cover and completing the cleaning process. You may now continue using the printer.